How to Start a Campfire: A Step-by-Step Guide for Beginners
Learn how to start a campfire safely with this beginner's guide covering fire lay types, tinder, kindling, fuel wood, and campfire safety tips.
Use this guide for
Better camping decisions, faster trip planning, and clearer gear choices. Use this article as your starting point, then keep going with related camping guides and practical help articles below.
How to Start a Campfire: A Step-by-Step Guide for Beginners
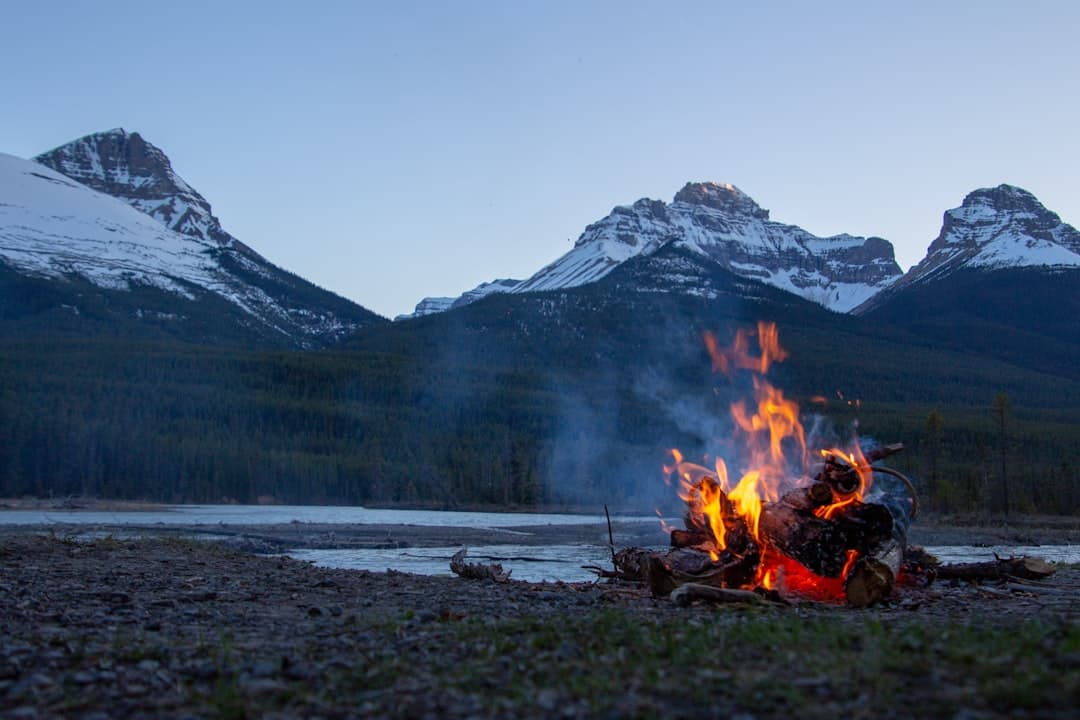
Knowing how to start a campfire is one of the most essential camping skills you can learn. Whether you're cooking dinner over the flames, staying warm on a cold night, or gathering around the fire with friends and family, a well-built campfire is the heart of any great camping trip. This guide walks you through everything you need to know — from choosing the right location to safely extinguishing the fire when you're done.
Before You Light: Check the Rules
Before building any campfire, always check local regulations. Many national parks, state forests, and campgrounds impose fire bans during dry conditions or high fire-danger periods. Look for posted signs at the campsite entrance or check the land management agency's website. Breaking fire rules can result in fines — and more importantly, wildfires.

If fires are allowed, use an established fire ring or fire pit whenever one is available. Never build a fire directly on bare roots or dry grass.
Gather Your Three Fire-Building Materials
Every campfire needs the same three things, in order of size:

Tinder — The smallest, most combustible material. Dry leaves, pine needles, birch bark, or commercial fire-starter cubes all work well. This is what catches the spark and creates the initial flame.
Kindling — Small sticks no thicker than your finger. Dry twigs snapped from dead lower branches (not green wood) are ideal. Kindling turns the tinder's small flame into something substantial enough to catch larger wood.
Fuel Wood — Larger logs and branches that burn long and steady. Hardwoods like oak, hickory, and maple produce longer-lasting, hotter fires than softwoods like pine. Always use dry, seasoned wood — wet or green wood produces mostly smoke.

Choose Your Fire Lay
There are several ways to arrange your wood. Here are the two most practical for beginners:
Log Cabin Fire Lay
Stack two larger logs parallel to each other, then place two more logs on top perpendicular to form a square. Build up several layers, getting smaller as you go. Place your tinder and kindling bundle in the center. This is great for cooking because it creates a stable bed of coals.
Teepee Fire Lay
Arrange kindling in a cone shape around a central bundle of tinder, leaning sticks together at the top. Add larger fuel sticks around the outside in the same teepee shape. Light the tinder at the base. The teepee is excellent for quick lighting and produces tall flames — ideal for warmth.
Step-by-Step: Starting the Fire
- Prepare your fire ring. Clear any debris from around the fire ring. Have water or dirt nearby to extinguish the fire if needed.
- Place your tinder. Set a loosely arranged handful of tinder in the center of the fire ring.
- Build your kindling structure. Use your chosen fire lay to stack kindling around and above the tinder, leaving enough airspace for oxygen to flow through.
- Light from the bottom. Use a lighter or matches to ignite the tinder at the base. Light from multiple spots around the tinder bundle for faster ignition.
- Feed the fire gradually. Once the kindling catches, add slightly larger sticks. Don't smother the fire — add wood one or two pieces at a time, leaving space for airflow.
- Add fuel logs once you have a strong flame. Place larger logs in a log cabin or teepee arrangement on top of the established fire.
Tips for Keeping Your Fire Going
- Blow gently at the base of a struggling fire to increase oxygen.
- Don't stack too much wood at once — a crowded fire starves of oxygen.
- Keep fuel wood dry — store it off the ground and under a tarp if rain is expected.
- Hardwood burns longer, softwood lights faster. Use softwood to get started, hardwood to sustain.
Cooking Over Your Campfire
Once you have a good bed of coals (not just flames), you're ready to cook. Coals produce consistent, controllable heat that's far better for cooking than an open flame. Let the fire burn down for 30–45 minutes before cooking directly over it.
A lightweight camping mess kit makes fire-cooked meals easy, whether you're boiling water for instant oatmeal or heating up a one-pot dinner. If conditions don't allow an open fire — or you want a reliable backup — a compact propane stove gets the job done fast.
Gear for Around the Campfire
How to Safely Extinguish Your Campfire
Never leave a campfire unattended or go to sleep with an active fire. To extinguish:
- Allow the wood to burn down to ash as much as possible.
- Pour water slowly over the fire, stirring the ash with a stick to reach all embers.
- Continue until you no longer see steam or hear any hissing — both signs that heat remains.
- Touch the ash carefully with the back of your hand. If it's still warm, add more water.
The rule of thumb: if it's too hot to touch, it's too hot to leave.
Final Thoughts
Learning how to start a campfire is one of those foundational skills that every camper should have. With the right materials, a solid fire lay, and a respect for fire safety, you'll have a reliable campfire every trip. Pair that with a good mess kit and comfortable seating, and you've got everything you need for a memorable night at the campsite.